contact us

Use the form on the right to contact us.

You can edit the text in this area, and change where the contact form on the right submits to, by entering edit mode using the modes on the bottom right.


123 Street Avenue, City Town, 99999

(123) 555-6789

email@address.com


You can set your address, phone number, email and site description in the settings tab.
Link to read me page with more information.

BKS-67021-SAKURA-8.JPG

Textured Bead Blog

Take your beading to the next level with bead artist Linda Landy posts regularly about the techniques you need to create bead-embroidered works that are sculptural, three-dimensional, and very textured. Keep up with trends and new products in bead embroidery and bead weaving. 


Is this bead heaven?

Linda Landy

Just got back from teaching classes at BeadsFX in Toronto, Canada. I've seen many bead stores in my travels, but never one as complete as BeadsFX. There is a glass studio and a separate metal studio. Lots of cool stuff in there, but as a bead weaver and embroiderer I have no idea what anything does. There's a huge classroom with a library and drawers of tools for class use. We did actually use some of the pliers. Oh, and they have beads and supplies. An extensive supply of seed beads from every manufacturer-- Toho, Miyuki, Matsuno and Czech-- in every size and color. Glass beads in every shape and number of holes, cabochons, gems, a whole room of Swarovski and more. There are supplies for all kinds of things-- resin, clay, leather, you name it. And, the staff and students could not have been nicer. Thank you to Marg and Pam for being such gracious hosts.

Glass studio

Glass studio

Metal studio

Metal studio

Swarovski crystal in every shape

Swarovski crystal in every shape

Miyuki, Toho, Matsuno, oh my.

Miyuki, Toho, Matsuno, oh my.

Enter your email address to subscribe to the Extreme Bead Blog. Be sure to verify when you get the email.:

Delivered by FeedBurner

Will these "Needle Pullers" save your fingers?

Linda Landy

I learned two things that night. I never go to CJS without industrial strength gloves and I need to protect my fingers while beading. I find that the most punctures occur when I am trying to force a needle through thick materials or tight beads. This weekend I tested out two new needle pullers or "finger savers." Here are my observations:

Read More

Enter your email address to subscribe to the Extreme Bead Blog. Be sure to verify when you get the email.:

Delivered by FeedBurner

I forgot: Thread Matters!

Linda Landy

I found myself working on a peyote rope. It looked great but working on it was a nightmare. I couldn't understand why it was SO STIFF. I told my dear bead buddy Myriam Ribenboim of my frustrations. "What thread are you using?" she asked. I immediately smacked myself in the head for breaking one of the rules that I have taught countless times.

Read More

Enter your email address to subscribe to the Extreme Bead Blog. Be sure to verify when you get the email.:

Delivered by FeedBurner

Bead Embroidery Checkerboards

Linda Landy

Here's how to create bead embroidered “checkerboards.” Make monochromatic checkerboards for subtle texture. Use two colors to create a dramatic element. If you choose to use two colors, the size of the bugles must match exactly. Remember, if you are using Czech bugles a buffer bead on each end is essential to prevent your thread from being cut.

Read More

Enter your email address to subscribe to the Extreme Bead Blog. Be sure to verify when you get the email.:

Delivered by FeedBurner

Registration starts tomorrow for the Bead&Button Show

Linda Landy

Bead&Button Show online class registration will open tomorrow, Tuesday, January 06, 2015 at Noon, CST. Back before I started teaching at the show I would have already decided which classes I wanted and anxiously waited for registration to open. One of my friends would even create an Excel spread sheet to make final class decisions. I was not that bad.

I'd clear my schedule so I could be at the computer when registration opened and open a window in my browser for each class I wanted so I could just go down the line and click to register for the class. The really great classes always sold out immediately, and I wanted to make sure that I got my seat. One year, poor planning had me standing in the crowds at EPCOT Center to register while my family toured the Mexican Pavilion.

The Bead&Button Show is a must for every serious beader. Always held in Milwaukee, it is the largest consumer jewelry and bead show in the world with a juried exhibit of amazing bead art and more than 500  classes -- bead embroidery, bead weaving, metal work, polymer clay, metal clay, lampwork, kumihimo, looming, and much much more. A huge (overwhelming) convention hall is full of hundreds of vendors sell precious gems, pearls, art beads, gold and silver, beading supplies and books.  And everyone there speaks bead.

I've already posted this information, but I just wanted to remind you of the classes I will be teaching at the 2015 show. I hope to see you there.

Take a Spin

Wednesday, June 3, 2015 8:00am-3:00pm

The intense color and texture of fish leather (yes it is really made from fish skin) is the perfect backdrop for this intricately embellished spinner (yes, it really spins). A bezeled Swarovski rivoli is surrounded with Czech spikes and pearls, and the cuff is edged with tiny pearls.  Students will learn how to engineer a working spinner, bezel a cabochon and set a grommet without breaking beads. They will also learn bead embroidery basics including backstitch, embellishing, finishing and edging. Kits will be available in a variety of spike colorways including frosted crystal with raspberry fish leather (shown below), blue sparkle with gray fish leather, Picasso green with Nutella fish leather, burgundy with fuchsia fish leather and more.

Tiny Dancer

Thursday, June 4, 2015 8:30am-3:30pm

A pie shaped cabochon bezeled and fringed with a lush cluster of marquise dangles in assorted color patinas invokes an image that comes right out of a painting from Renoir’s ballerina series. The shine of the polished cabochon works with the rough patinas to create a pendant rich in color and texture that can be suspended from the chain or rope of your choice. Kits will be available in a wide variety of natural stone cabochons.

1505449_1491439087808855_6401519450727431897_n[2].jpg

The Right Spot (Leopard, Tiger, Zebra and Snow Leopard)

Friday, June 5, 2015 8:30am-4:00pm

Textured bead embroidery takes this whimsical animal print bracelet to the next dimension. Using pre-printed beading foundation as a guide, embroider Rizos vertically to give the illusion of fur. Students will learn how to read a graph, basic embroidery techniques, how to back and edge it, how to add a clasp. Kits will be available in Leopard, Tiger, Zebra and Snow Leopard.

The Other Side of the Moon

Saturday, June 6, 2015 9:00am-5:00pm

This stunning textured bead embroidered bracelet proves you don’t have to spend a fortune on cabochons. Surround a dollar’s worth of bezeled cabs with dense layers of Czech glass daggers, lentils, rondelles, drops, pearls, petals and more to create a bracelet that’s out of this world. Students will learn how to bezel a cabochon, backstitch, layer and combine many different types of beads to create a variety of effects, finish and edge bracelet. Kits will be available in four colorways including lime and turquoise (below) and amber and brown.

Enter your email address to subscribe to the Extreme Bead Blog. Be sure to verify when you get the email.:

Delivered by FeedBurner

My head is spinning....

Linda Landy

I know I just signed off for the year, but something so exciting happened I just had to share. My "Take a Spin" bracelet is the featured piece on the official Bead&Button Show Poster. What an honor. Again I wish you a happy, healthy and prosperous new year. Thank you for letting me share this with you!

Enter your email address to subscribe to the Extreme Bead Blog. Be sure to verify when you get the email.:

Delivered by FeedBurner

I made it out of beads...

Linda Landy

With the first night of Hanukkah on Tuesday, it seems appropriate to revisit the peyote dreidel I created in 2007. It took a year of trial and error to come up with the final design (I have a box labeled "Dreidel Graveyard). I was thrilled when Bead&Button selected it as one of their free online projects: Beaded Dreidel.

Tubular peyote stitch is worked around a wooden cube in cobalt, gold and silver using a graph as a guide. The stem is also covered by a peyote tube and topped with a Swarovski Margarita. Each panel features one of the Hebrew letters associated with the traditional Hanukkah game of chance. The four letters that adorn the sides stand for the phrase "Nes gado haya sham," which means "a great miracle happened there."

The response over the years has been overwhelming. I have sold hundreds of kits to as far away as France and England. One friend sat down at the Beading Place at the Bead&Button Show a few years ago and saw a woman working on the project. It turned out to be the beader from France. During a Laura McCabe Master Class a few years ago another friend mentioned the project in conversation when across the room another student shouted, "You're the Dreidel Lady!?!?!?" She had made five of them.

Of all the projects I have worked on and classes I have taught, the timeless Beaded Dreidel has been the most successful. Thank you to all the beaders out there who have made them.


The last two weeks of the year are jam packed with the hustle and bustle of the holidays. This blogger is taking a few weeks off. I wish a happy, healthy and prosperous New Year to you and your family. Look for my next post on January 5, 2015.

Enter your email address to subscribe to the Extreme Bead Blog. Be sure to verify when you get the email.:

Delivered by FeedBurner

Online browsing for Bead&Button Show 2015 starts Tuesday

Linda Landy

Online browsing starts Tuesday, December 9,  for the 2015 Bead&Button Show. Even if you won't be able to attend the show, check out the listings. The inspiration is amazing, and it's a showcase of the latest trends in beading. There are classes for every skill level, age group, and technique. 

I hope you'll check out the classes I will be teaching.

The Registration Booklet has shipped. If you've signed up for classes in the last three years, you'll be getting a copy in the mail soon. If you haven't registered in the past 3 years order your booklet now.

Registration begins at noon on Tuesday, January 6


Enter your email address to subscribe to the Extreme Bead Blog. Be sure to verify when you get the email.:

Delivered by FeedBurner

Check out these new Czech beads!

Linda Landy

Welcome the newest members of the CzechMates Beading System: the CzechMates Bar and the CzechMates QuadraTile! I had a chance to play with them, and they have endless possibilities and a huge choice of colors. They will be available in February 2015. I submitted two trendsetter projects. Can't wait to see how they will be used.

Starman quadrille.png

Enter your email address to subscribe to the Extreme Bead Blog. Be sure to verify when you get the email.:

Delivered by FeedBurner

Support Straps

Linda Landy

In Desert River I was unhappy with the grip of my bezel in certain areas because of the shape of the cabochon. Working off the edge the bezel, I created two three-bead wide, odd-count flat peyote support straps over the top of the cab and embellished them. They became a design element which I think added to the bracelet.

Here is how I did it:

  • Position your thread so it exits the “up bead” on the bezel where you want the strap to begin.

  • To work a three bead wide strap, the number of beads in each row will alternate between one and two beads. The first row is just one bead.

  • Work in odd count flat peyote (page xx) until you have a strip long enough to touch the opposite side of the bezel.  There must be an even number of rows in order to “zip up” your strap. Better short than long because you want the strap to hold firmly across the top of the cab.
  • Our next step will be to attach the strap to the other side of the bezel. Before we can do that it is important to lock in the last bead on the final row by weaving through an adjacent bead on the strap and back through the final bead. This will prevent your beadwork from loosening up when you attach the strap.
  • Fit the strap into the “up beads” on the other side of the bezel. Follow the thread path to “zip” the edge of the bail to the top of the bezel. Gently pull tight as you go so the strap is completely interlocked into the bezel.

  • Reinforce the connection by following the thread path in the opposite direction.

  • Using stitch in the ditch technique , embellish the edges and top of the strap.

straps blog 4 and 5.jpg

Enter your email address to subscribe to the Extreme Bead Blog. Be sure to verify when you get the email.:

Delivered by FeedBurner

The Problem With Inside Curves (Part 2)

Linda Landy

This is part two of the instructions for the Bugle Bezel. As you may recall, not all shapes can be bezeled using traditional methods -- especially anything with an inside curve. When you begin to tighten your bezel around a cabochon with an inside curve, the bezel wall on the inside curve will tighten up as if that side was straight, leaving a gap between the bezel and the cab. You can overcome the issue with inside curves by creating a  bugle bezel. See last weeks instructions for a ring ladder.

We will start with the bugle bead ladder we learned about last week. Remember, I should fit completely around the cab when laid on its side and is constructed of an even number of bugle beads.

Affix the cabochons to your foundation using Terrifically Tacky Tape of E6000. Fit the ladder ring onto your cab. To secure the ring to the foundation, knot your thread and bring it up through the foundation position your needle so that the thread is exiting a bugle at the top of the cab. 

Pick up an 11/0 seed bead and pass down through the adjacent bugle and through the foundation. Pass up through the foundation and the next bugle

bugle bezel 1.jpg

Repeat until you have passed completely around the cab.

Position your needle so that it is exiting an 11/0 bead at the top of the first bugle. Using the 11/0 beads at the top of the bugles, complete a round of peyote with 11/0 beads.

Step up and complete two rounds of peyote using a 15/0 seed bead. Your cab should now be encased in the bugle bead bezel. If it is not secure, add an additional round or two of peyote stitch using a 15/0 Charlotte. Work your thread down through the foundation, knot and trim.

Enter your email address to subscribe to the Extreme Bead Blog. Be sure to verify when you get the email.:

Delivered by FeedBurner

The Problem with Inside Curves (part one)

Linda Landy

 As you have probably observed, I love the unconventional. But, experience (and a lot of frustration) has led me to the conclusion that not all shapes can be bezeled using traditional methods -- especially anything with an inside curve. When you begin to tighten your bezel around a cabochon with an inside curve, the bezel wall on the inside curve will tighten up as if that side was straight, leaving a gap between the bezel and the cab.

BKS-67021-3-37.jpg

You can overcome the issue with inside curves by creating a "bugle bezel."

This week I will teach you how to make a bugle ladder and next week we will learn how to turn it into a bugle bezel.

Find a Japanese bugle bead that is just slightly shorter than the height of your concave cab. (If you use a Czech bugle you will have to add a buffer 11/0 round seed bead at each end of the bugle to prevent thread breakage.)

  • Start a bugle bead ladder. Use a comfortable length of thread with needles on both ends. Position the bugle bead at the center of the length of thread. Pick up the next bugle with needle 1 and bring it down to the first bugle. Using needle 2, pass through the bugle from the opposite direction. Pull gently so the two bugles are parallel and even.

  • Pick up the next bugle with needle 1 and bring it down to the first bugle. Using needle 2, pass through the bugle from the opposite direction.
  • Continue building the ladder until it will fit completely around the cab when laid on its side. Make sure that your ladder is constructed of an even number of bugle beads.
  • Using the same technique you used to build your ladder connect the two ends of the ladder to form a ring.

  • Secure both needles with a few half hitches and trim.

Check in next week to learn how to transform your bugle ladder to a bugle bezel.

Enter your email address to subscribe to the Extreme Bead Blog. Be sure to verify when you get the email.:

Delivered by FeedBurner

Here are my classes for Bead&Button Show 2015

Linda Landy

The Bead&Button Show is a must for every serious beader. Always held in Milwaukee, it is the largest consumer jewelry and bead show in the world with a juried exhibit of amazing bead art and more than 500  classes -- bead embroidery, bead weaving, metal work, polymer clay, metal clay, lampwork, kumihimo, looming, and much much more. A huge (overwhelming) convention hall is full of hundreds of vendors sell precious gems, pearls, art beads, gold and silver, beading supplies and books.  And everyone there speaks bead.

Here are the classes I will be teaching at the 2015 show. I hope to see you there.

Take a Spin

Wednesday, June 3, 2015 8:00am-3:00pm

The intense color and texture of fish leather (yes it is really made from fish skin) is the perfect backdrop for this intricately embellished spinner (yes, it really spins). A bezeled Swarovski rivoli is surrounded with Czech spikes and pearls, and the cuff is edged with tiny pearls.  Students will learn how to engineer a working spinner, bezel a cabochon and set a grommet without breaking beads. They will also learn bead embroidery basics including backstitch, embellishing, finishing and edging. Kits will be available in a variety of colorways.

Tiny Dancer

Thursday, June 4, 2015 8:30am-3:30pm

A pie shaped cabochon bezeled and fringed with a lush cluster of marquise dangles in assorted color patinas invokes an image that comes right out of a painting from Renoir’s ballerina series. The shine of the polished cabochon works with the rough patinas to create a pendant rich in color and texture that can be suspended from the chain or rope of your choice. Kits will be available in a wide variety of natural stone cabochons.

The Right Spot

Friday, June 5, 2015 8:30am-4:00pm

Textured bead embroidery takes this whimsical animal print bracelet to the next dimension. Using pre-printed beading foundation as a guide, embroider Rizos vertically to give the illusion of fur. Students will learn how to read a graph, basic embroidery techniques, how to back and edge it, how to add a clasp. Kits will be available in Leopard, Tiger, Zebra and Snow Leopard.

The Other Side of the Moon

Saturday, June 6, 2015 9:00am-5:00pm

This stunning textured bead embroidered bracelet proves you don’t have to spend a fortune on cabochons. Surround a dollar’s worth of bezeled cabs with dense layers of Czech glass daggers, lentils, rondelles, drops, pearls, petals and more to create a bracelet that’s out of this world. Students will learn how to bezel a cabochon, backstitch, layer and combine many different types of beads to create a variety of effects, finish and edge bracelet. Kits will be available in four colorways.

Enter your email address to subscribe to the Extreme Bead Blog. Be sure to verify when you get the email.:

Delivered by FeedBurner

Working with beading threads

Linda Landy

I’ve sat through some pretty frustrating classes where the teacher insisted that I use double thread and wax. It drives me crazy. I understand that sometimes the engineering of the project demands that you use doubled thread and wax, but whenever possible I avoid it. I hate the feel of the wax and the double thread often makes it Impossible to go back and correct mistakes – and I make a lot of them. Double thread is really not necessary for bead embroidery. Instead of doubling, use a stronger test thread or reinforce your work. 

Some beaders swear by a specific thread, length of thread, needle or tool. I almost always tell my classes to do what is comfortable for them. If you like wax, use it. Or don’t—beading is supposed to be fun. How much thread? You decide.

Use the information below to make your own decisions. Just have fun.

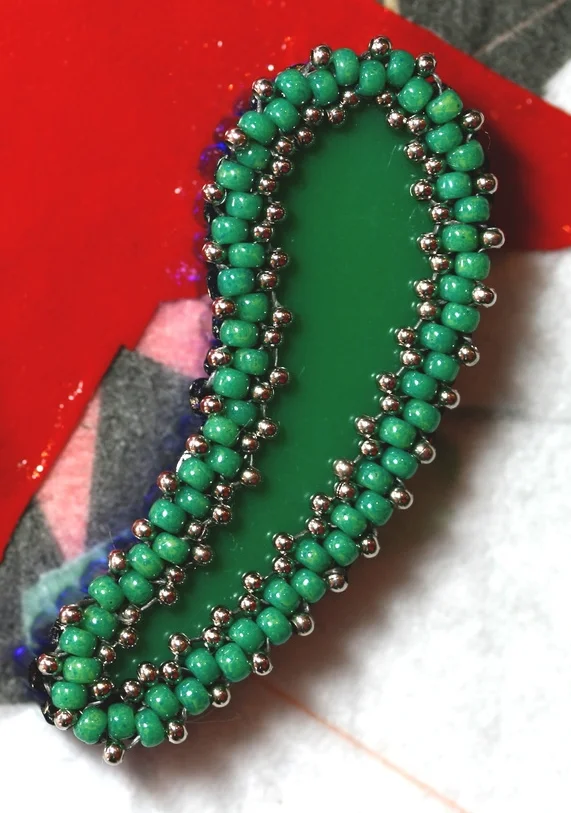
Thread Conditioners: To Wax or Not

One of the great things about bead embroidery is the ease of changing your mind. If you don’t like how something looks or you want to correct an error, just remove your needle and pull the beads off. Unfortunately, this makes any thread fray, especially if you split your thread as you pass through beads more than once. In addition, using thread lengths in excess of three yards causes wear and tear on the thread. When the eye of your needle is rough, the thread in the eye gets frayed and worn, and the eye itself may break due to pulling. 

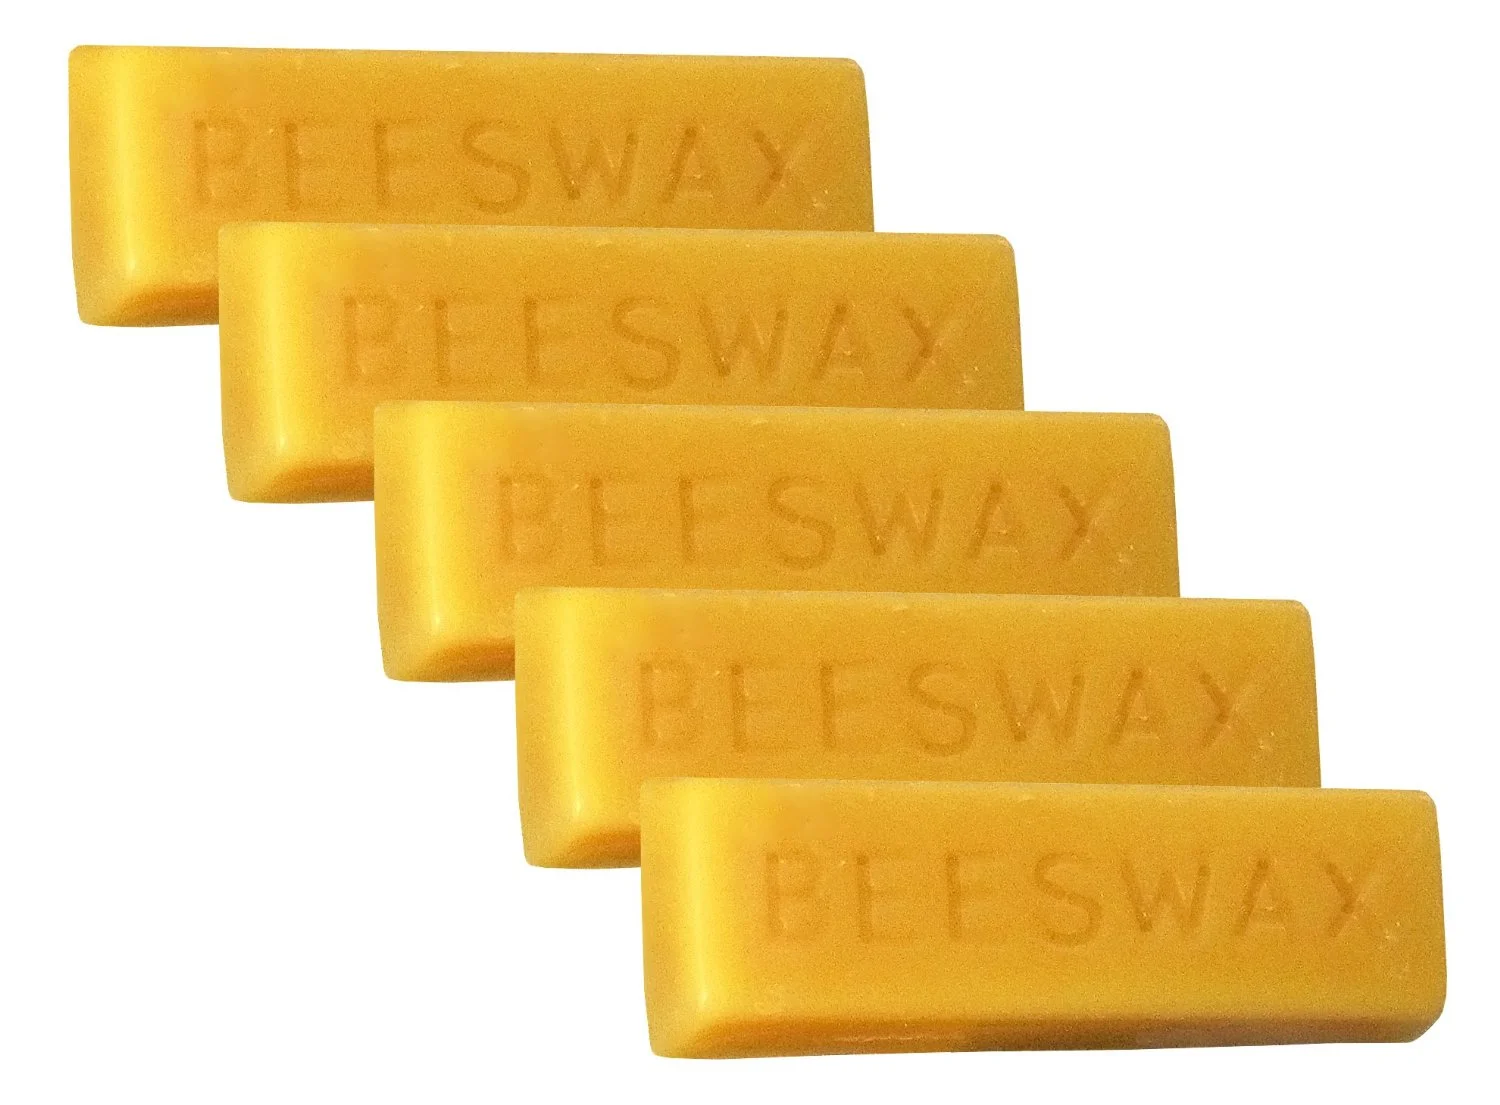
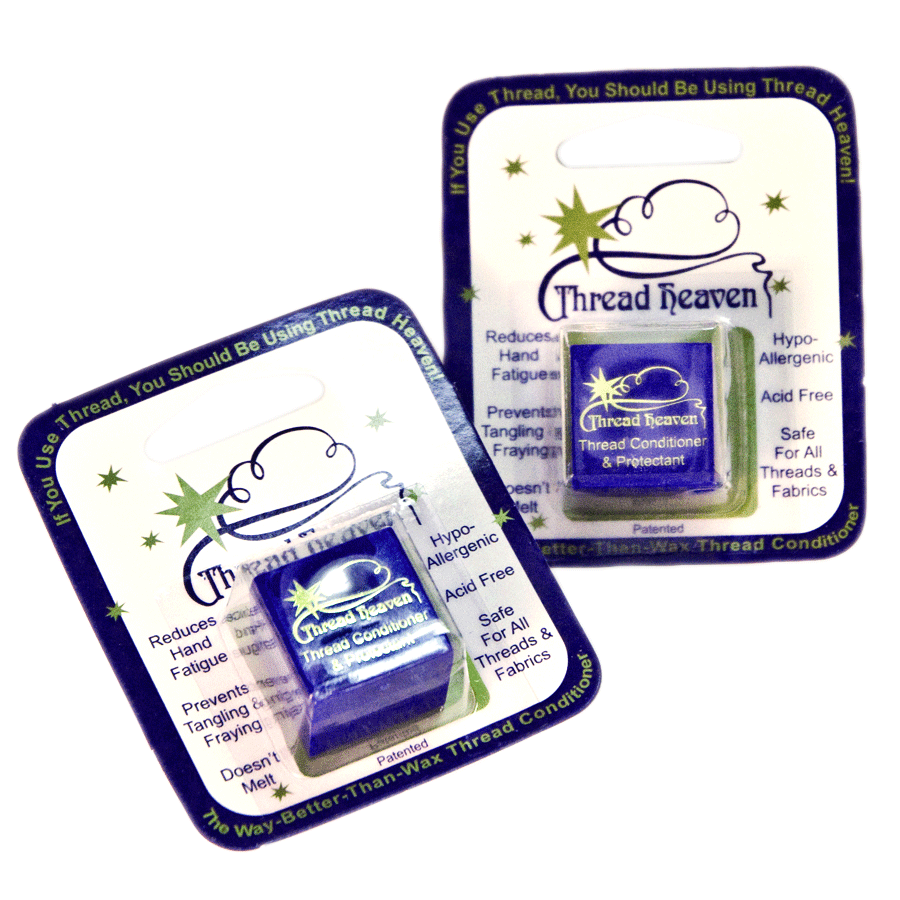
A major “controversy” in beading is thread conditioning. Some beaders swear by beeswax, microcrystalline wax or Thread Heaven. An equal number use neither. You can decide what you prefer with experience.

Beeswax has been used for many years but has been largely replaced with microcrystalline wax, a man made, petroleum product that does not dry out or get hard like Beeswax. Both add body to the thread which helps maintain tension. Because microcrystalline is not organic, it doesn't break down over time. Microcrystalline is easy to apply and less sticky or messy.

If you have a lot of wax build up in the bead holes, you are using too much wax. This will also build up in the eye of the needle and you will not be able to thread the needle eventually. Hold the needle in your hand or hold it up to a lamp to warm the wax and clear the needle's eye.

Thread Heaven is not a wax. It is a lubricant that repels thread from itself to prevent knotting. Since most knots happen when the cut end of the thread twists around the main part, the manufacturer recommends that you keep the cut end coated with a thread conditioner.  How to Use Thread Heaven

Many beaders lightly coat beading thread with wax for smooth working action and protection against thread fraying, knotting and water damage. When working with doubled thread, wax is helpful to fuse the two threads together so they work as one.

How do I apply thread conditioner?

Thread your needle. Holding the thread below the needle, drag the thread through your choice of conditioner a couple of times. Run your fingers over the thread or wipe with a soft towel to remove any excess. Re-wax as needed.

How much thread do I start with?

I hate to add new thread, so I work with the longest length possible. Unfortunately, the longer the thread the more likely it will tangle — which isn’t too much fun either. So you have to find out what works best for you. I find that the longest length of thread I can handle is the of span my arms. Thread the needle with your thread and pull back a working “tail” of 8 to 10 inches. Hold the needle between your fingers on one hand.  Hold the spool or bobbin of thread in the other hand.  Extend both your hands out to the side, as far as they will go. Let the thread unwind from the spool/bobbin using even tension, no sagging or stretching. This is where you cut your thread. Some people stretch their arm further than others and some have shorter arms than others... it is an approximate length. Use what works best for YOU.

No Tangle Thread Bobbins

Made of flexible plastic, these handy thread bobbins  allows you to flip open the bobbin and wind string or ribbon on to the spool. Flip the plastic back down over the thread after you have wound it around the bobbin. The locking feature prevents threads from unraveling and tangling. The bobbins are stackable and will snap together for easy storage. For my tool bag and travel kit, I transfer an assortment of Fireline sizes and colors (4, 6, 8 and 10 in crystal and smoke) and label them. That way I always have whatever I need without those cumbersome spools.

Thread Color

Try to match the thread to the beads.  To prevent thread from showing, use a neutral on the dark side. Black thread is too dark and shows with most beads. This can be an advantage if you like the shadow of the thread to set off your colors. White thread is best suited for white or extremely light colored beads that read as white in the work. Neutral colors such as taupe, tan, beige and gray work with a lot of bead colors. Keep in mind that dark or matching color threads can enhance, change, or completely gray out the transparent beads. The color of the thread will affect the color of any transparent bead in the piece you are working on. A dark thread may show through pale beads, but as a rule of thumb, a darker color will show less than a lighter color. Also consider the amount of thread visible in the technique you have selected – Peyote shows less than brick, for example. Test the thread with the beads so you have no surprise color changes in the work. You can tint white or light colored threads with a Sharpie to match your beads at points where thread is showing. You can also pull white thread through the point of the Sharpie to color it before you use it.

When backing your bead embroidery, I strongly urge you to match your thread to the backing as closely as possible.

Enter your email address to subscribe to the Extreme Bead Blog. Be sure to verify when you get the email.:

Delivered by FeedBurner

Color me frustrated

Linda Landy

Choosing seed bead colors for a bead embroidery project can be a challenge.

The color numbers often make no sense. You would think that 460 is 460. Not so fast. Take for example the array of choices for just one color number on the whimbeads.com website:

  • 460 : Raspberry Bronze
  • 460A : Raspberry Bronze Iris
  • 460B : Purple Metal Iris
  • 460C : Purple Fuchsia Metal Iris
  • 460D : Purple Fuchsia Goldlustre
  • 460E : Blue Teal Metal Iris
  • 460F : Antique Bronze
  • 460G : Steel Blue Metallic
  • 460H : Bronze/Olivine Iris
  • 460i : Bright Fuchsia Gold Iris
  • F460A : Raspberry Bronze Matte
  • F460B : Dk. Army Green Matte
  • F460C : Bronze Purple Matte
  • F460D : Purple Fuchsia Metal Matte
  • F460E : Dragon Scales
  • F460F : Denim Purple Iris Matte
  • F460G : Steel Green Gold Iris Matte
  • F460H : Bronze/Olivine Iris Matte
  • F460i : Bright Fuchsia Gold Iris Matte
  • F460J : Purple Midnight Iris Matte
  • F460K : Blue Cardinal Iris Matte
  • F460L : Teal Cardinal Iris matte
  • F460M : Teal Purple Iris matte
  • F460N : Transparent Amy./Purple Matte
  • F460P : Transparent Amy./Purple Iris Matte
  • F460Q : Grey/Blue/Gold Iris Matte
  • F460R : Lizard Skin
  • F460S : Fuchsia/Lime/Gold Iris Matte
  • F460T : Desert Sun

F usually means frosted or matte. PF means permanent finish. Y is often hybrid.

Let's complicate things further: At some point Miyuki decided to change their numbering system. For example, 457F is also known as 2006-- depending on who's selling it. They even have a chart on their web page specifying beads which have two different color numbers.

Miyuki Color Number Variations

You'd assume that you could just go by the color name. Wrong again.

Caravan Beads, a major US importer of Miyuki seed beads, says on their website:

"Each Delica bead is assigned an item number by Miyuki, which correspond between sizes of Delica (though not between Delicas and seed beads). For example: DB0010 Black is #10 in 11/0 Delicas and DBL-0010 (#10) in 8/0 Delicas as well. In seed beads Miyuki's number for black is 401. Miyuki does not name the colors, so different companies may call colors by different names."

Caravan Beads Guide to Bead Finishes

As a rule, when I've established a color for a larger piece I like to purchase it in 15/0, 11/0, 8/0 and cylinder. That's where the problems start. Beads identified by the same color number can be VERY different depending on the size of the bead. The surface area of the bead makes a big difference. IT can also be just differences in dye-lots. Many recommend that you overbuy beads for an important project, because, different batches of the same color beads can vary tremendously. If the color is just too off for the project, I just omit the bead in the offending size. In fact, not all bead colors are available in al the sizes. The 11/0 beads have much greater color choices than the 15/0 and 8/0. Delica beads also have the greatest color selection in 11/0 than 10/0, 8/0 and 15/0.

But wait, there's more. Round Miyuki seed beads have a completely different numbering system that the Miyuki Delica beads. Matte Met Dk Raspberry Iris is 2005 in round seed beads and 312 in cylinder beads. If you want to match them up, just check out Miyuki's conversion charts. You can go from Round to Delica or Delica to Round.

Miyuki Bead Color Conversion Charts


Enter your email address to subscribe to the Extreme Bead Blog. Be sure to verify when you get the email.:

Delivered by FeedBurner

Buying Seed Beads

Linda Landy

So, we've already discovered that determining bead color and manufacturer variations make bead shopping a challenge. Let's talk about making sure we are getting the best deal. Buying seed beads is a lot like buying paper towels. Every package of paper towels has a different number of sheets in the roll, different size sheets, different paper thickness, different colors, different everything. There is no way to tell if you are getting the most for your hard earned dollar.

Beads are much the same. This store sells six inch tubes and  the other store sells three inch tubes. But wait, the third store also sells three inch tubes but the tubes are smaller in diameter. The only way to seriously comparison shop is by checking the number of ounces of beads.

Buying in Tubes: A bead tube is not a bead tube. There are many size tubes with different diameters and lengths. When comparing prices, always check the tube size and number of grams. Good websites usually list the approximate number of beads in a tube, but these are approximate measurements. The actual number of beads is affected by the diameter and length of a tube, the characteristics of the bead and how it is packed. You may think tubes packed to the brim is a bonus -- until you open the tube and the beads start flying out.

Buying in Hanks: Czech beads are sold in tubes, by the strand, or by the "hank" consisting of 12 strands, each about 20 inches long. Four hanks are equal to ¼ mass. One mass = 16 hanks or 192 strands.

How many beads? This is the information that I have gathered over time from a number of resources.  It is the chart I use to prepare and price my kits. I would appreciate it if anyone who has more information would share it with us!

beads per gram.jpg

Check out Charlene's Beads great Weights and Measures information.


Enter your email address to subscribe to the Extreme Bead Blog. Be sure to verify when you get the email.:

Delivered by FeedBurner

If you just know where to look

Linda Landy

I am constantly amazed by what you can find on the internet. There is an incredible wealth of free information (including detailed instructions) out there if you just know where to look.  There are amazing YouTube videos demonstrating just about everything. Many of the major online bead merchants have great resources. Check out these links (in no particular order):

Big Bead Little Bead

Julianna C Hudgins' About.com Beadwork

Fusion Beads Beading Q&A

Fusion Beads Techniques

Beadaholique

Whim Beads

Shipwreck Beads

Fire Mountain Resources

Jewelry Supply Videos

Bead&Button (click the references tab)

Aunties Beads Design Center

Beading Daily

Beadage

Beadwrangler (tons of links)

Sara Spoltore (recommended by my friend Marti Wakshlag)

There's so more more information out there. I am always finding new things.

Please share your favorite links.


Enter your email address to subscribe to the Extreme Bead Blog. Be sure to verify when you get the email.:

Delivered by FeedBurner

Textured Bead Embroidery is now available

Linda Landy

With the much anticipated debut of Textured Bead Embroidery imminent, I thought I'd talk a little about why this book is different?

This book is designed for all beaders. Beginners will find everything they need to try bead embroidery for the first time. For intermediate and advanced beaders there is a wide variety of innovative new techniques and some fun projects. But I am most proud of the chapter on designing. It was developed to allow more experienced beaders to create their own pieces with confidence. I discuss how I approach a new piece and cover several artistic concepts written from the perspective for a bead embroidery artist.

There are several things that make this book unique. First and foremost are the innovative techniques that I have developed for bead embroidery and my unusual three dimensional style. This is a new and different style of bead embroidery. I have built upon what I learned from the incredibly talented bead artists that came before me. I take common beads and use them in unexpected ways. Textured Bead Embroidery is exciting and dramatic. It is for the bead artist who wants to take the craft to the next level.

The projects in the book are new and fresh and different. They were designed to be very doable and unintimidating. I want the reader to look at the projects and say, “I love that and I can do it.”

Just as important is the CD included with the book. I love the idea that the reader can print the designs right on to their beading foundation and start beading. Being able to print the designs out onto your beading foundation eliminates a lot of the upfront work for a project.

And, I don’t think any of the other bead embroidery books have approached the subject on a bead-by-bead basis. The bead glossary explores the types of beads I use and their applications. I expect it to be an excellent reference source. A bead says to herself, “Okay, I love these daggers. What can I do with them? How do I shop for beads? What beads should I avoid?” The answers are all there.

In my years of teaching I have learned the importance of clear, concise and detailed instructions with lots of photographs and illustrations. I taught myself bead weaving by reading Carol Wilcox Wells’ book Creative Bead Weaving. This book was written so that anyone could pick it up and jump headfirst into Textured Bead Embroidery.

I also talk about overcoming the problems I faced when I first started bead embroidery. I would have saved a lot of tearing out and torn foundation had I known some of the techniques I explain in the book.

Finally, I love all the little tips that are tucked into the book. I hope the readers enjoy them.

The concepts and projects in the book are new and fresh and different. They were designed to be very doable and unintimidating. I want the reader to look at the projects and say, “I love that and I can do it.”


Enter your email address to subscribe to the Extreme Bead Blog. Be sure to verify when you get the email.:

Delivered by FeedBurner

Seed Bead Sizing

Linda Landy

Here's a quick review of seed bead sizing for my new beaders out there: Seed bead sizes decrease as the measurement number increases. In other words, a 15/0 bead is smaller than an 11/0 bead, which is in turn smaller than an 8/0 bead.

In general, round (or rocaille) seed beads come in sizes 15/0(or 14/0), 13/0, 11/0, 8/0 and 6/0.

Japanese cylinder beads (Delicas) are available in size 15/0 (small), 10/0 (medium), 11/0 and 8/0 (large).

Heavy Metal seed beads area available in 15/0, 11/0, 8/0 and 6/0. 

One version of seed bead sizing says that the size (11/0) is the number of seed beads in an inch. Supposedly, if you line up eight 8/0 beads, eleven 11/0 beads and fifteen 15/0 beads they should all measure one inch. Others say that the size approximately indicates the number of beads that you can line up in a 20mm length. Get a metric ruler (the one they gave you for free at the last big bead show) and line up eleven 11/o beads, and they should measure around 20mm. A third source says that the seed bead size is related to the size of glass rod used to make the beads. It's hard to say what it really means, but the important thing to remember is that bead sizes are in inverse proportion to the size of the bead. A size 15 is almost invisibly tiny, and size 5 is giant.

In reality, there is great variability in the actual size of beads, depending on the manufacturer or source of origin. The actual size of a bead differs greatly depending on finish and manufacturer. Japanese 11/0's, for example, tend to be a larger than Czech 11/0's, and the size of a bead with a lot of effects on it will be noticeably larger than a bead without effects. For example, the basic transparent 11/0 will be noticeably smaller than the metallic iris 11/0. They can be up to 20 percent larger or smaller.

Toho has an amazing shape chart on their website that is an incredible reference -- along with the amazing colors of all of their beads. It gives the actual size of their beads in millimeters. It really helps to see all the sizes and shapes together. Toho Beads


Enter your email address to subscribe to the Extreme Bead Blog. Be sure to verify when you get the email.:

Delivered by FeedBurner