The Problem with Inside Curves (part one)
Linda Landy
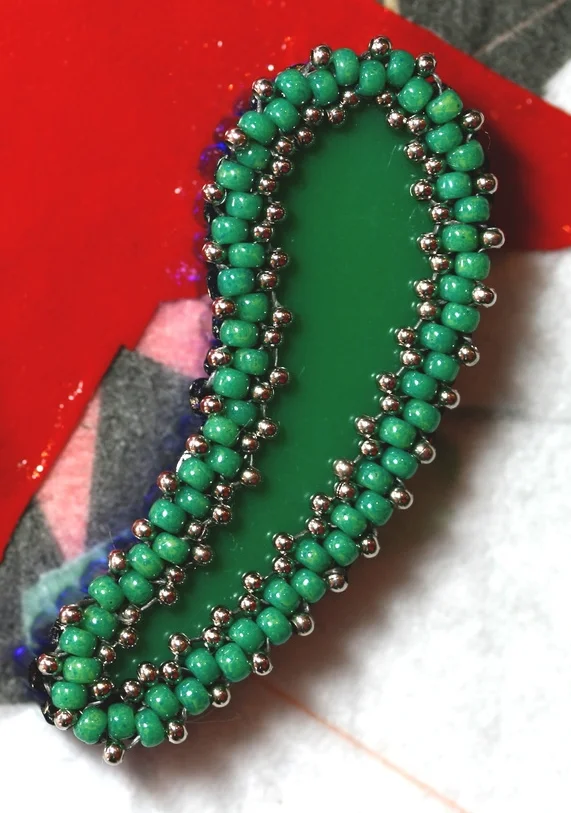
As you have probably observed, I love the unconventional. But, experience (and a lot of frustration) has led me to the conclusion that not all shapes can be bezeled using traditional methods -- especially anything with an inside curve. When you begin to tighten your bezel around a cabochon with an inside curve, the bezel wall on the inside curve will tighten up as if that side was straight, leaving a gap between the bezel and the cab.

You can overcome the issue with inside curves by creating a "bugle bezel."
This week I will teach you how to make a bugle ladder and next week we will learn how to turn it into a bugle bezel.
Find a Japanese bugle bead that is just slightly shorter than the height of your concave cab. (If you use a Czech bugle you will have to add a buffer 11/0 round seed bead at each end of the bugle to prevent thread breakage.)
Start a bugle bead ladder. Use a comfortable length of thread with needles on both ends. Position the bugle bead at the center of the length of thread. Pick up the next bugle with needle 1 and bring it down to the first bugle. Using needle 2, pass through the bugle from the opposite direction. Pull gently so the two bugles are parallel and even.
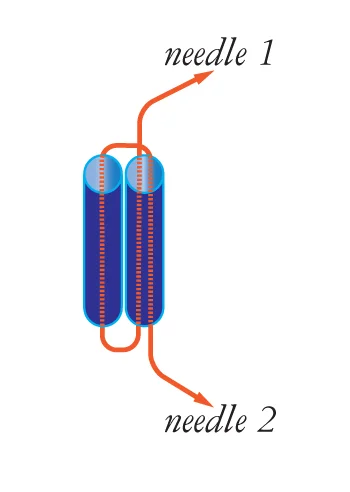
- Pick up the next bugle with needle 1 and bring it down to the first bugle. Using needle 2, pass through the bugle from the opposite direction.
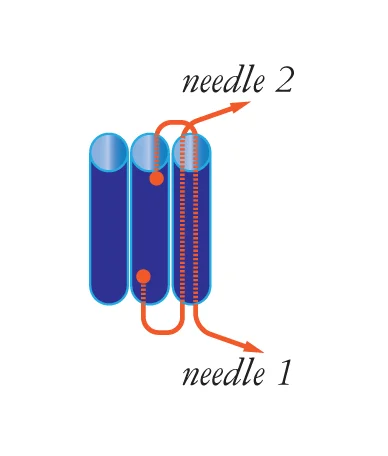
- Continue building the ladder until it will fit completely around the cab when laid on its side. Make sure that your ladder is constructed of an even number of bugle beads.
Using the same technique you used to build your ladder connect the two ends of the ladder to form a ring.
- Secure both needles with a few half hitches and trim.
Check in next week to learn how to transform your bugle ladder to a bugle bezel.