Bead Embroidery Checkerboards
Linda Landy
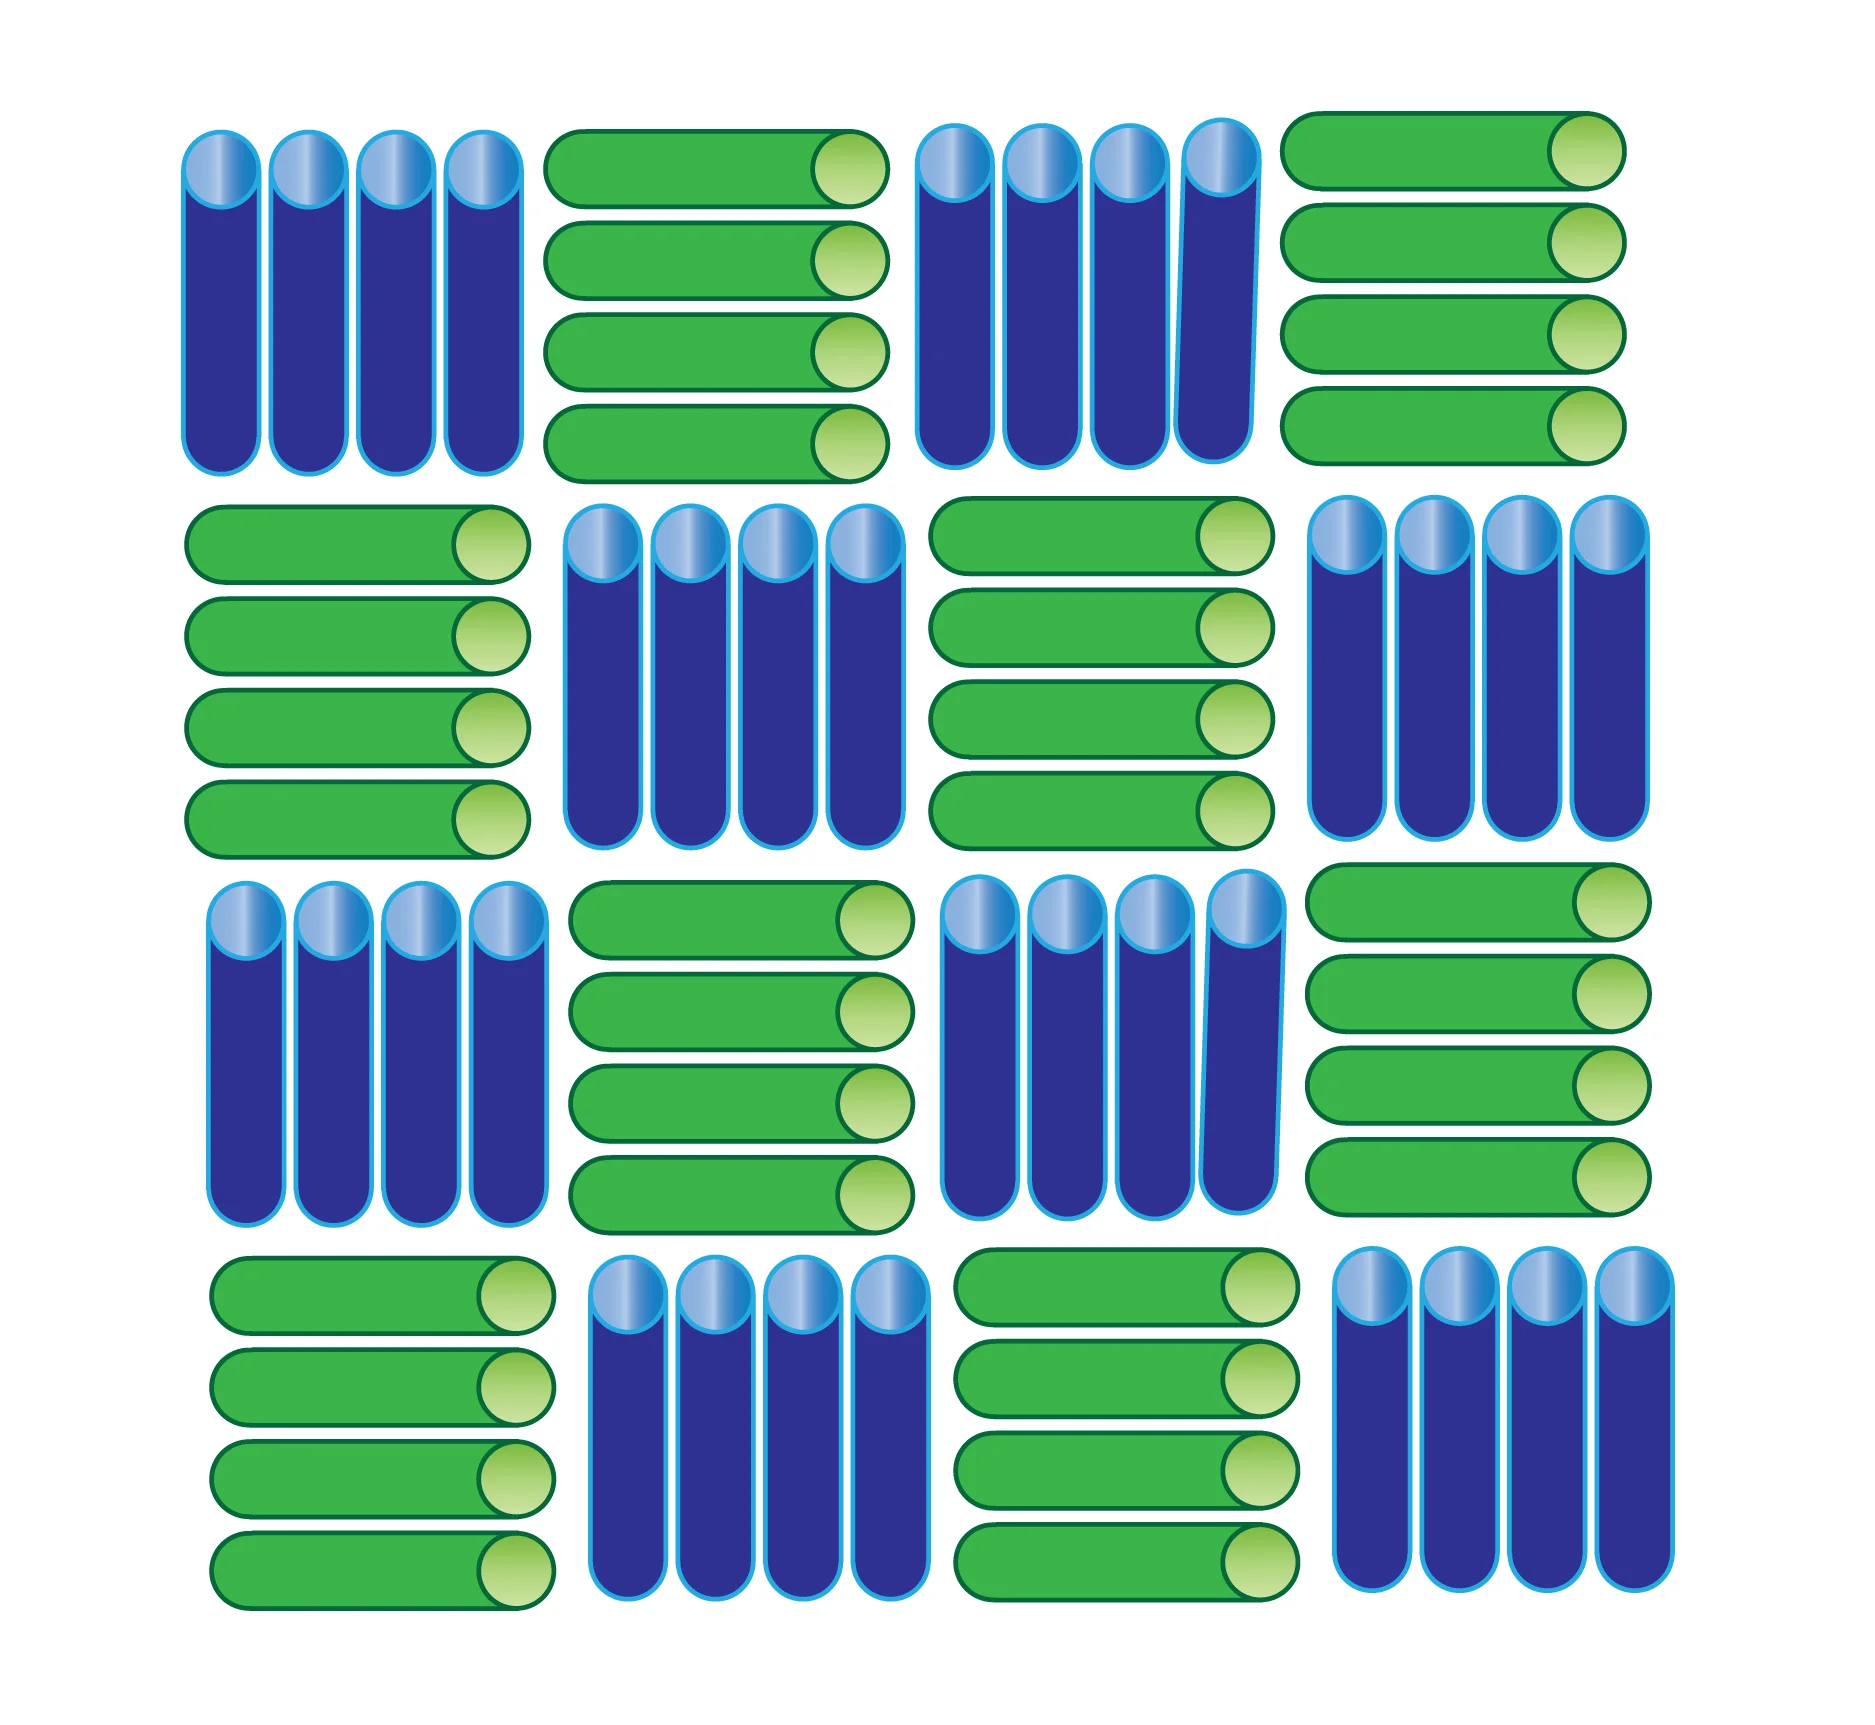
Here's how to create bead embroidered “checkerboards.” Make monochromatic checkerboards for subtle texture. Use two colors to create a dramatic element. If you choose to use two colors, the size of the bugles must match exactly. Remember, if you are using Czech bugles a buffer bead on each end is essential to prevent your thread from being cut.
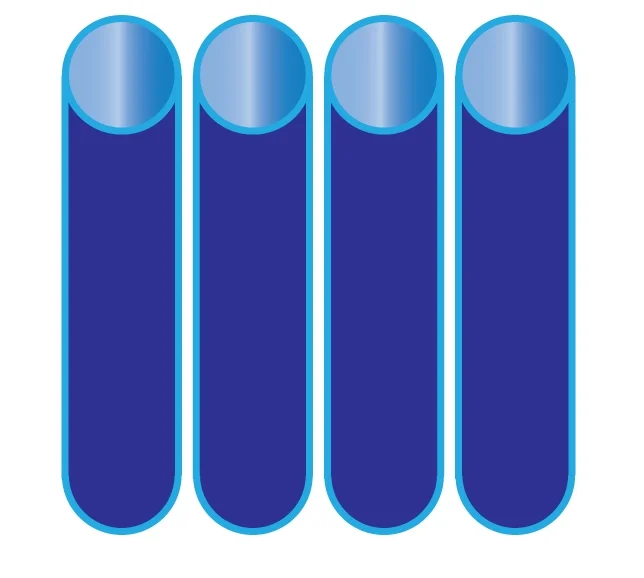
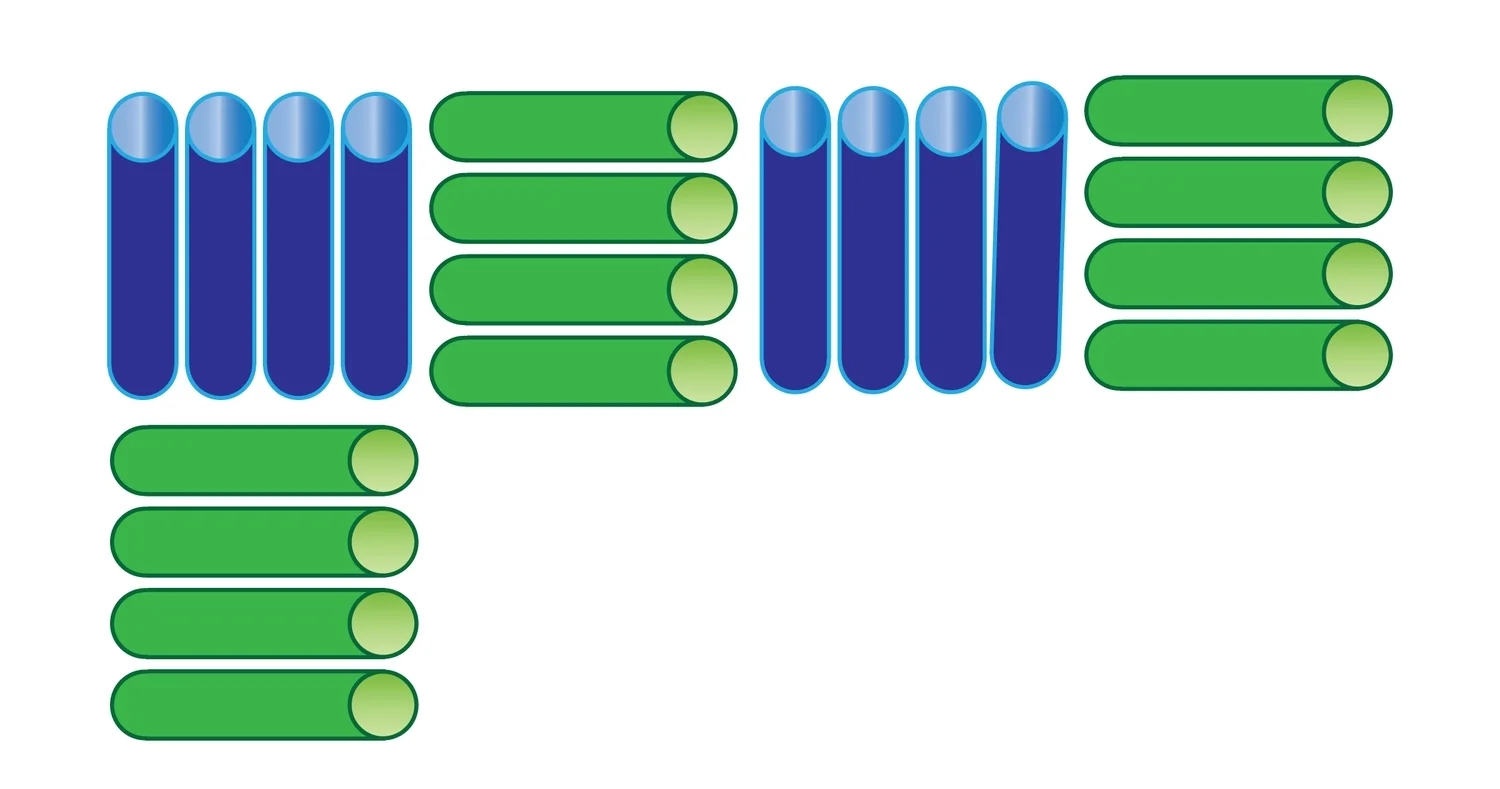
Without stitching, lay a color one bugle bead vertically. Lay enough color two bugle beads horizontally to match the height of the vertical color one bugle. The number of horizontal beads needed to match the height of the bugle establishes the number of beads in each block. We’ll call that number “X.” In the sample diagram X equals four.

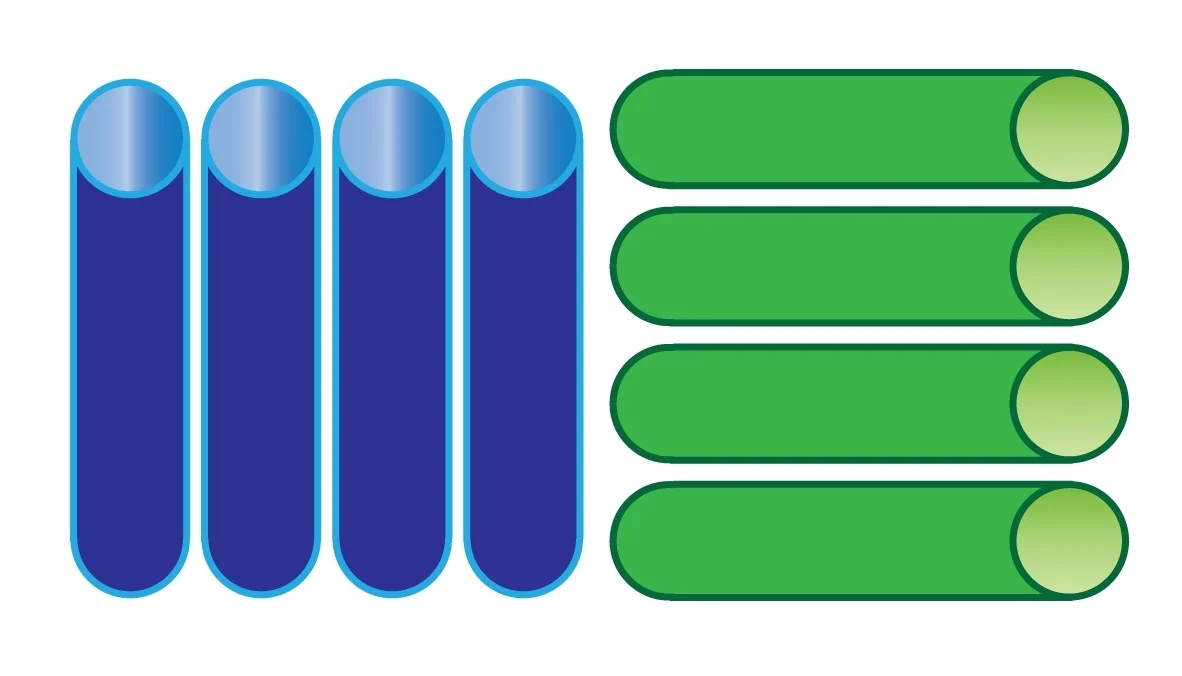
Decide where you want your checkerboard to start and stitch "X" color one bugles vertically side by side, right up against each other in perfect alignment.
Immediately adjacent to the first block, stitch "X" color two bugles horizontally side by side, right up against each other in perfect alignment.
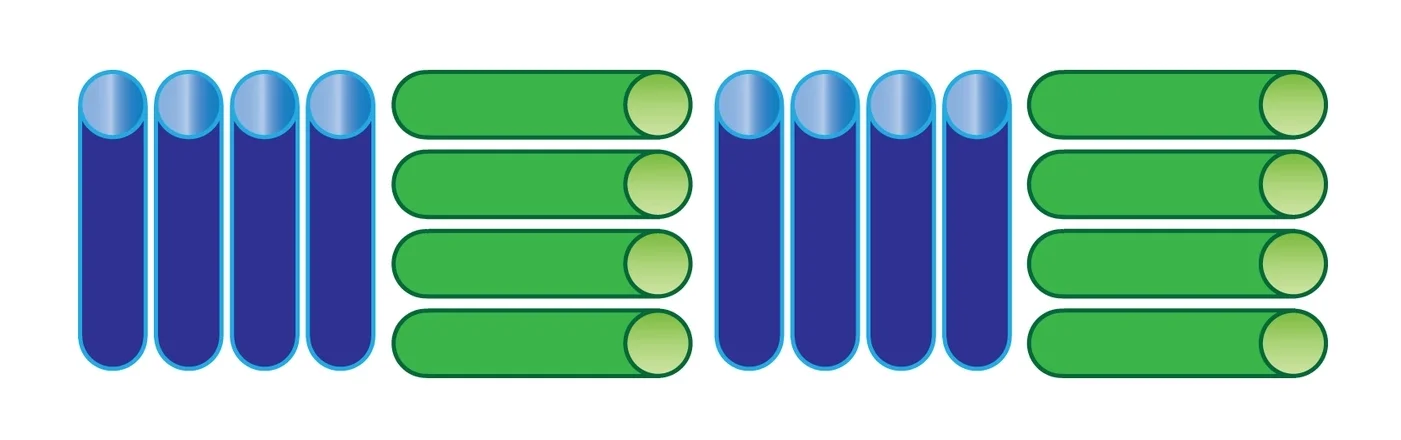
Continue alternating "X" bugles vertically and horizontally to create the first row of your checkerboard.
Beneath your first block of vertical color one bugles, stitch "X" color two bugles horizontally side by side, right up against each other in perfect alignment with the original block.
Beneath your first block of horizontal color two bugles, stitch "X" color one bugles vertically side by side, right up against each other in perfect alignment with the original block.
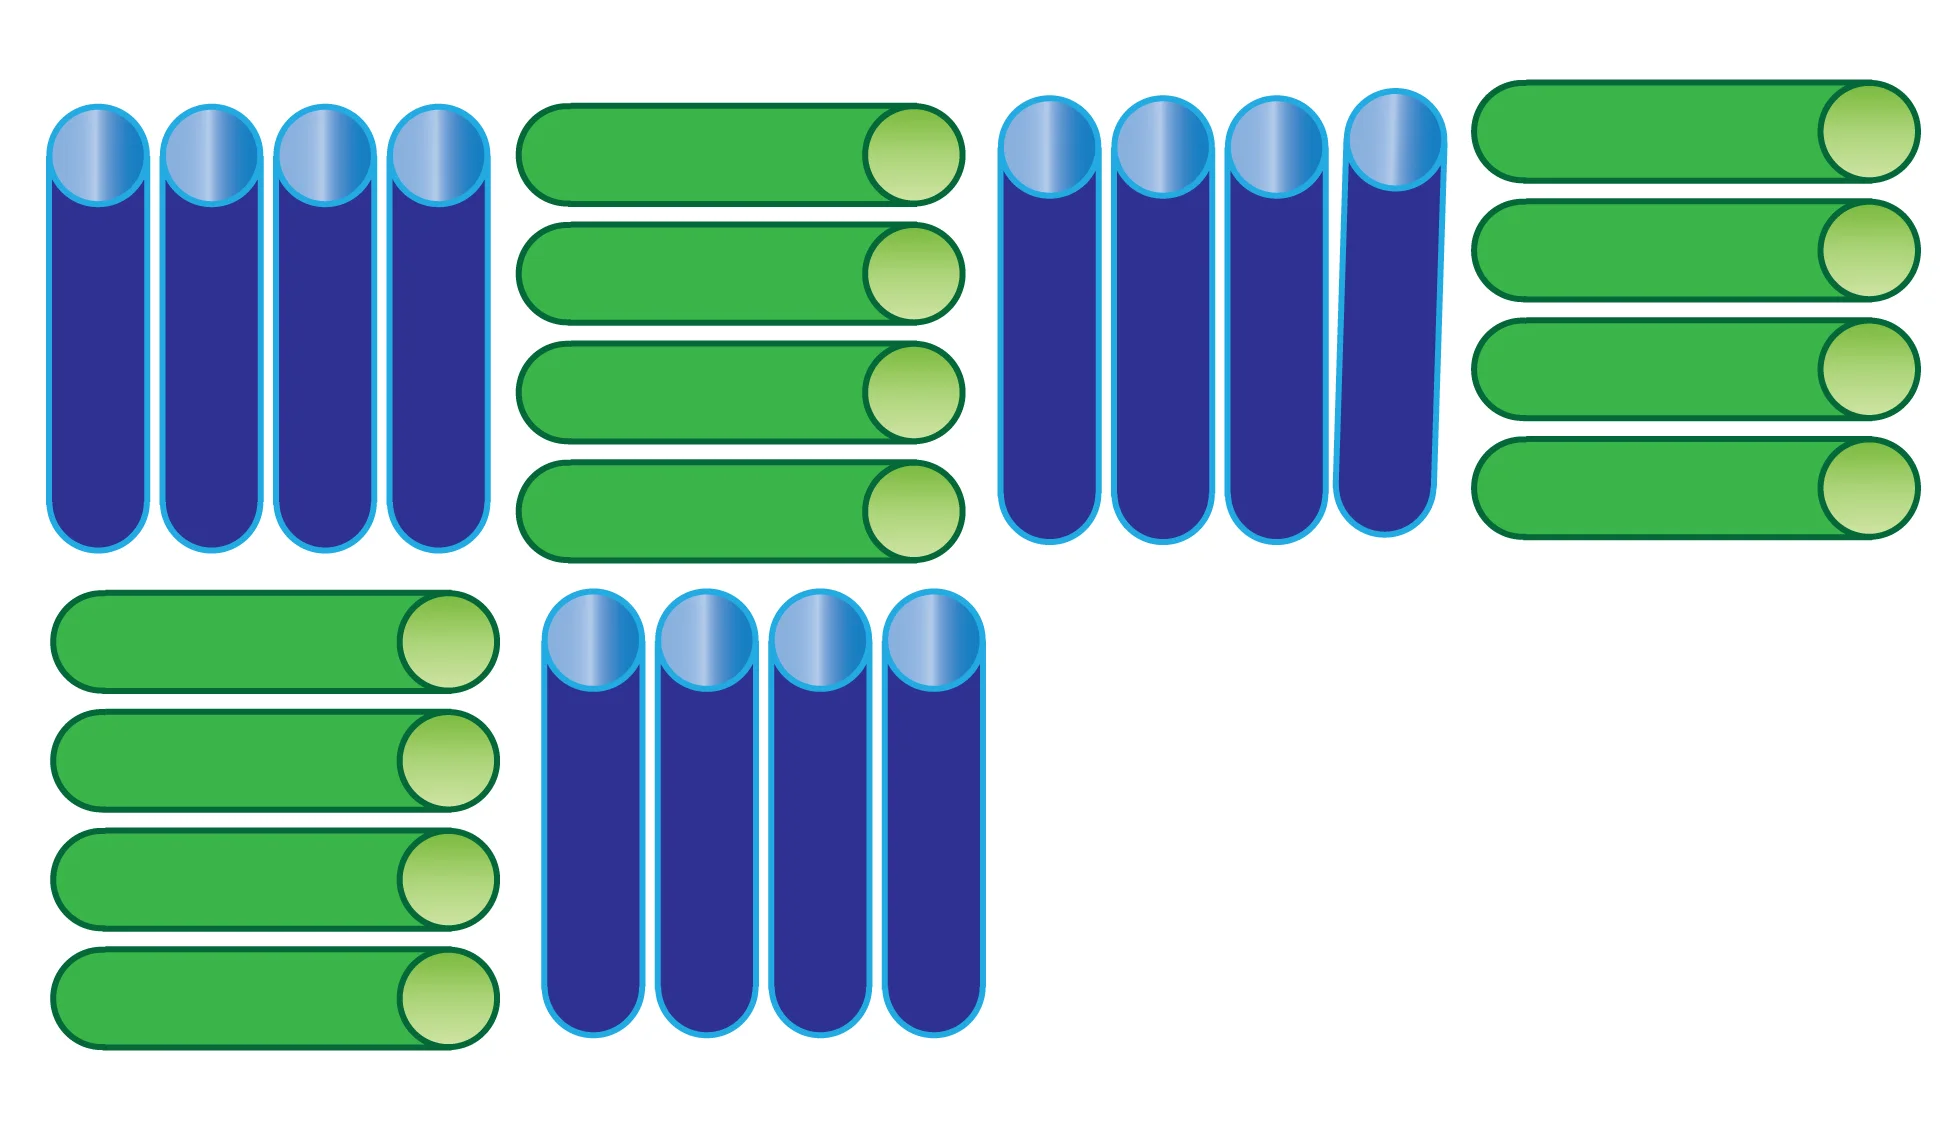
Continue alternating "X" bugles vertically and horizontally to create rest of your checkerboard.

Use your imagination to create other bugle bead patterns.