contact us

Use the form on the right to contact us.

You can edit the text in this area, and change where the contact form on the right submits to, by entering edit mode using the modes on the bottom right.


123 Street Avenue, City Town, 99999

(123) 555-6789

email@address.com


You can set your address, phone number, email and site description in the settings tab.
Link to read me page with more information.

BKS-67021-SAKURA-8.JPG

Textured Bead Blog

Take your beading to the next level with bead artist Linda Landy posts regularly about the techniques you need to create bead-embroidered works that are sculptural, three-dimensional, and very textured. Keep up with trends and new products in bead embroidery and bead weaving. 


The "Cool Stuff" Rule

Linda Landy

Here is the next in a series of tips that were left out of Textured Bead Embroidery in the interest of space. I hope you enjoy them.

I took a class with Susan Lenart Kazmer when she was first starting to teach. I was in love with her amazing work with found objects. Unlike today, she didn’t have kits or sell objects. You had to work with what you brought from home. I didn’t have any “cool stuff” at home, and that made the class very frustrating.

From that moment on, I became a collector of “cool stuff.” If I saw something that inspired me I bought it and added it to my collection. I squirreled away bits and pieces of things I found around the house. I bought beads because I liked them, not just because I needed them for a specific project.

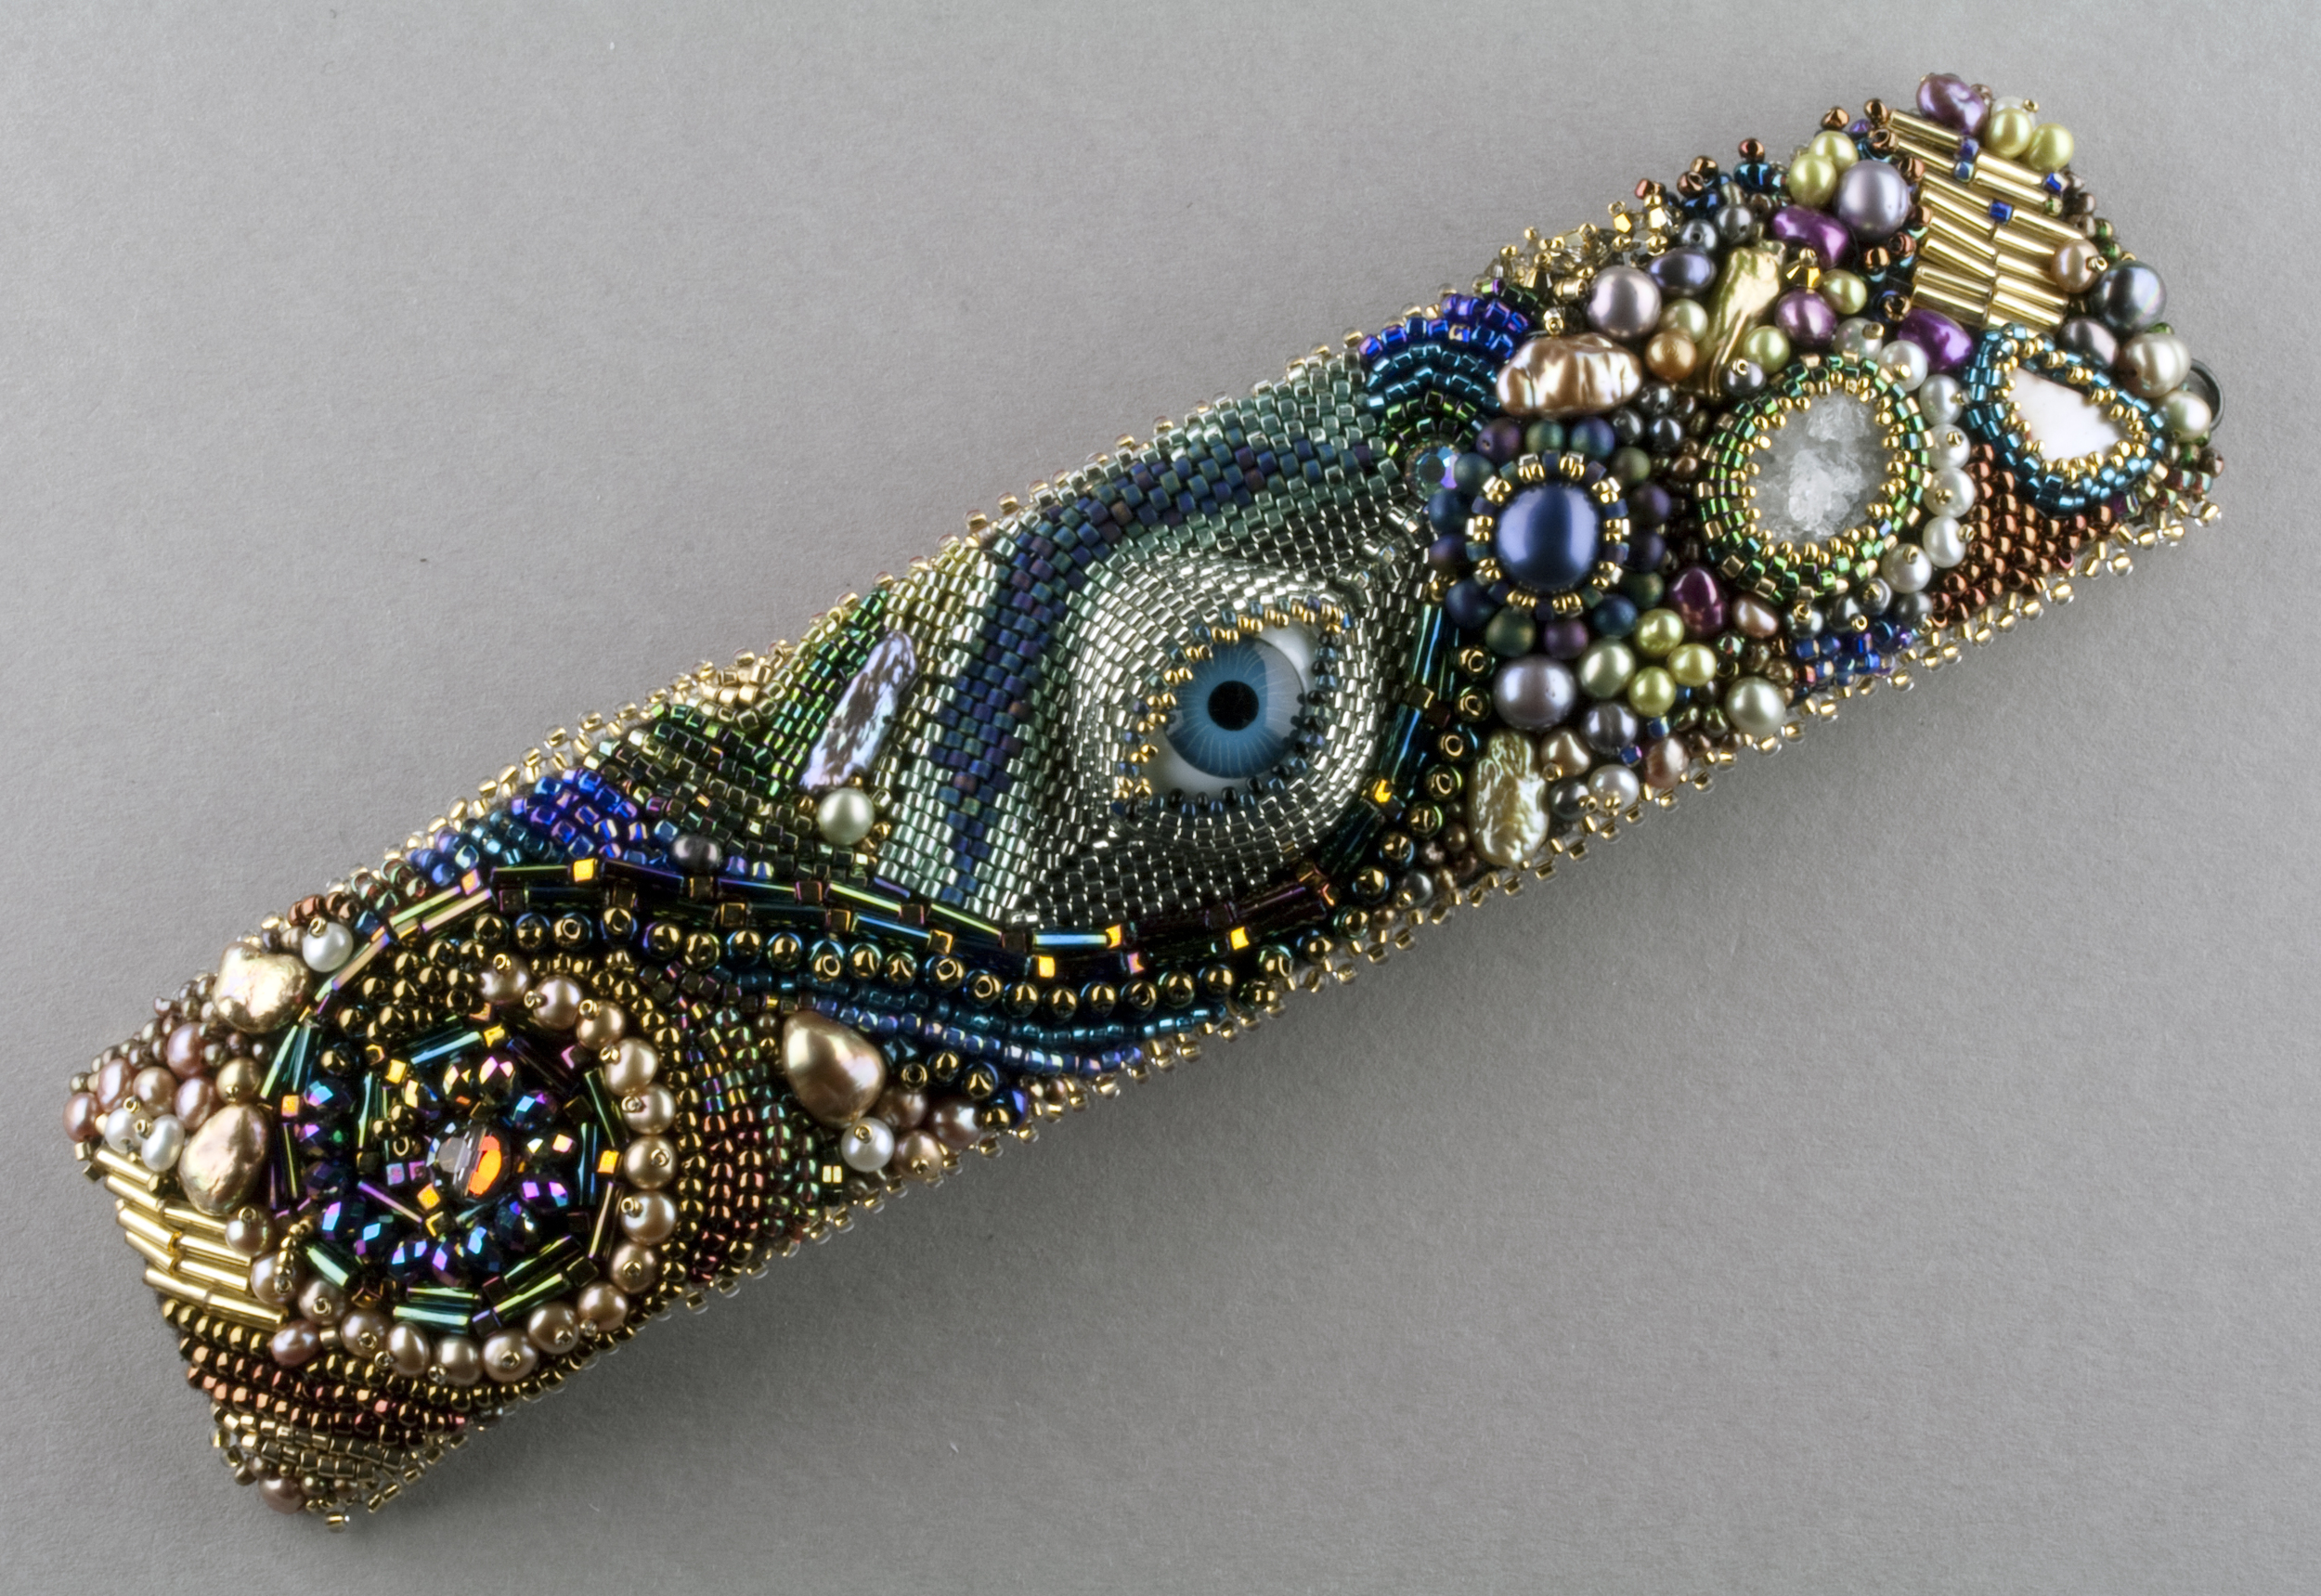
In 2012 I won first place in finished jewelry at the Bead&Button Show Bead Dreams competition with a piece I named Tilt! I wanted it to look like a pinball machine. The focal points were all repurposed, most from my cool stuff collection. The bumpers were created from slices of vintage billiard balls and antique sewing machine spools. The flippers were found in a tub at the Bead&Button Show. The plunger was a binder post scavenged from an old book and an unidentified spring found in my junk drawer. When my son’s constantly clacking Newton's Cradle toy mercifully tangled years ago, I salvaged the little chrome balls. (Don’t ask me why.) They have found a new home as "pinballs."

The moral of the story is if you have the space and the money, become a collector. You never know when that weird frog button will find the perfect home on a fabulous necklace.

TILT!

TILT!

Enter your email address to subscribe to the Extreme Bead Blog. Be sure to verify when you get the email.:

Delivered by FeedBurner

Bead "Auditions"

Linda Landy

Here is the next in a series of tips that were left out of Textured Bead Embroidery in the interest of space. I hope you enjoy them.

Seed beads are tricky little devils. Their color can change dramatically based on the light source, surrounding beads, thread, background, bead finish and other factors.

Although seed beads are irresistible hanging on pegs in fabulous hanks, I find row after row of bead tubes sorted by color mesmerizing. But, I have learned the hard way that what you see is not what you get. They look very different when removed from the comfort of their fellow beads and forced to stand on their own.

My mother always “auditions” her beads. No matter where she is (stores, my kitchen table, in a car…) she takes out her trusty beading needle and lines a half dozen or so right on the needle to get a more accurate idea of how they will look in a project. It is actually extremely effective if you don’t mind picking up beads wherever they may have scattered.


Enter your email address to subscribe to the Extreme Bead Blog. Be sure to verify when you get the email.:

Delivered by FeedBurner

Shopping Tips for Bead Embroidery

Linda Landy

Here is the next in a series of tips that were left out of Textured Bead Embroidery in the interest of space. I hope you enjoy them.

My initial attempts at shopping for beads were major disappointments a very important reasons: I did not know enough about beads to make intelligent choices and I did not have a plan.

After a 20 year hiatus from beading, I signed up for a class at the local community center in 2000, and the teacher took us on a field trip to a downtown jewelry supply store. Every possible inch of every wall, floor, counter and shelf was covered with strands, piles and bags of beads and findings. I was completely overwhelmed and after more than an hour walked out without making a purchase. Unfortunately, I no longer suffer from that condition.

After that ill-fated shopping trip I made a plan and turned to the Rio Grande catalog I borrowed from the teacher. That first purchase seemed outrageously expensive at the time, but the resulting projects launched me on my current path.

Shopping for beads is itself an art. Here are some tips on maximizing your experience: 

  • Go with a plan but be open-minded.

  • If you see something that speaks to you, buy it and make sure you purchase enough because you don’t know whether you’ll find it again.

  • If you find a bead shape that seems to work for you and your budget allows, buy it in a small selection of the colors you use most often. That way, you have a back-up stash to go to when the specific elements you chose for a piece fail to achieve the effect you envisioned.

  • Take advantage of internet sales and promotions to stock up on the things you use most often.

  • Maximize your purchasing power. The more you buy, the cheaper it is. Order as a group and take advantage of the savings.

  • Support your local bead store so it stays open. You never know when you need to pop in for an emergency tube of beads.


Enter your email address to subscribe to the Extreme Bead Blog. Be sure to verify when you get the email.:

Delivered by FeedBurner

Blending in Bead Embroidery

Linda Landy

Here is the next in a series of tips and techniques that were left out of Textured Bead Embroidery in the interest of space. I hope you enjoy them.

My very first Bead Dreams entry was inspired by a fabulous tree frog button and a heap of variegated and embellished daggers, lentils and ovals. I wanted the frog to sit on what looked like a grass vista at sunset – grass, then sunset peaking through the grass, then sunset, then blue sky. And, I wanted the grass to have texture and body. 

The  solution was a technique I call Sunset Glades -- rows of daggers supported by rows of ovals and lentils. The technique also encompasses color blending. The daggers lay beautifully instead of flopping around and the color and shape transition is seamless.

Sunset Glades

  1. Start at the bottom and backstitch a row of daggers in color one. To reinforce the beads, pass through the entire row again.

  2. Above that row backstitch a row of oval lentils in the same color tightly against row one. Pass through the entire row again. The ovals disappear into the background, but they support the daggers and added dimension.

  3. Repeat that pattern (tightly stitched rows of daggers then ovals) until you want to introduce the next color.

  4. To transition into the next color intersperse a few randomly placed color two daggers and ovals among the rows of color one beads. With each subsequent row increase the number of color two beads in random areas (obviously decreasing the number of color one beads) until there are only color two beads.  This is a classic method for blending colors as you transition from one to another.

  5. Repeat until you want to introduce the next color.

  6. To taper off the design, replace a few randomly placed daggers with lentils. With each subsequent row increase the number of smaller beads (obviously decreasing the number of color one beads) until there are only small beads.

SPLENDOR IN THE GRASS

SPLENDOR IN THE GRASS

Enter your email address to subscribe to the Extreme Bead Blog. Be sure to verify when you get the email.:

Delivered by FeedBurner

OMG, where did this loop come from?

Linda Landy

Here is the next in a series of tips that were left out of Textured Bead Embroidery in the interest of space. I hope you enjoy them.

It is inevitable that one day you will turn over your beadwork and discover that your thread got caught on something (the edge of your foundation, a knot, a bead…) and there is a giant loop of thread back there. It can also happen if you get a knot in your thread. There’s an easy fix. Release the loop and cut it at the middle. Tie a square knot (with an extra knot if it is Fireline) flush with the foundation and trim off the excess. Problem solved.

Enter your email address to subscribe to the Extreme Bead Blog. Be sure to verify when you get the email.:

Delivered by FeedBurner

There’s a hole in my foundation!

Linda Landy

Here is the first in a series of tips that were left out of Textured Bead Embroidery in the interest of space. I hope you enjoy them.

I learned the hard way that if you rip out your beads too many times in the same location it is very easy to wear a hole in the foundation. To repair the hole:

Cut a piece of beading foundation large enough to extend beyond the hole approximately a quarter inch on each side.

  1. Apply a small amount of E6000 to the edges of the hole on the back of the project.

  2. Attach the patch to the back and let it dry.

  3. Embroider as usual making sure to stitch into the edges of the patch. The foundation may be a little harder to work with because the glue stiffens the foundation. The patch is reinforced as you stitch over the edges in the process of adding new beads.

Enter your email address to subscribe to the Extreme Bead Blog. Be sure to verify when you get the email.:

Delivered by FeedBurner

Hook Line and Sinker

Linda Landy

While wandering through the Gathering Place at the Bead&Button show I met Ralonda Patterson who was stitching art dolls. Then I noticed these amazing fish she had designed. I was hooked. I rarely buy kits but I just had to have one. Talk about texture, I loved the little dagger fins and tails. She captured fish scales with her beads and sculpted the fish by varying the size of her beads. Check out Ralonda's Blog.

Enter your email address to subscribe to the Extreme Bead Blog. Be sure to verify when you get the email.:

Delivered by FeedBurner

A real eye opener

Linda Landy

Just wanted to share this wonderful bracelet made by my friend  Kasey Mazzara. She took bead embroidery to the next level by creating a three dimensional element using free form peyote stitch. Notice the wonderful flow of the beads. It is completely free form, but she has used color and weight to balance the bracelet. Kasey says the bracelet just evolved. I've often said to listen to the beads. They know where to go. Thank you Kasey for sharing your creation.

Bead Embroidered bracelet by Kasey Mazzara

Bead Embroidered bracelet by Kasey Mazzara

Enter your email address to subscribe to the Extreme Bead Blog. Be sure to verify when you get the email.:

Delivered by FeedBurner